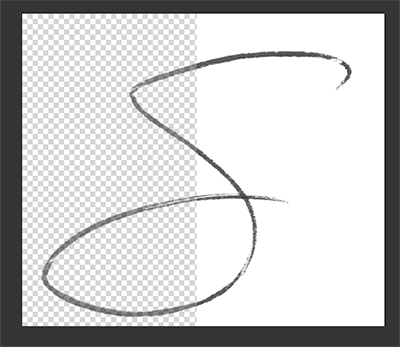
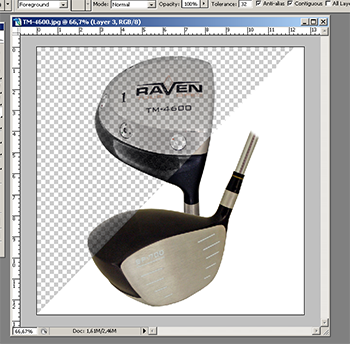
Do you want to remove a white background in Photoshop without using selections? This will leave everything that is not white transparent. The darker it is, the less transparent it gets.

So why did I set out to do this in the first place? My first image I wanted to do this with was my signature. I used a pen and paper, then scanned it at high resolution. But after this project, it has become apparent that this technique is needed in other situations as well. Product photos, logos etc. And a lot of people ask for “How to remove a white background?”. So here it is!
Over the years, I have gone through three stages.
Using the Remove White plugin made by Mark McLaren
I used it back in the days of Photoshop 5 and really loved the way you could lift out any object from the white background with a click. If any pixel was not completely black, it would be partially transparent. This meant that soft shadows could be lifted off as well, something I have not been able to do with any other method so far.
Using an extra file – msvcrt10.dll – to be able to run the Remove White plugin
This was basically just a workaround that allowed me to run older plugins in Photoshop CS2. It worked well until the next version of Photoshop was released. So I started searching for a more general way to do this.
Today, I am using a special layer mask
Using any of the normal selection tools is not an option. The finer details and imperfections in a pen stroke would be destroyed. So I needed something else. It would also destroy the fine gradient of soft a shadow.
The solution is to use a special layer mask, and it is actually pretty simple. This should be possible for someone to turn into a Photoshop action or a plugin, but I will leave this for someone else to do. Thank you to Cai at Stackexchange for this tip!
The short explanation is that I invert a greyscale version of the image and use that as a layer mask.
First, duplicate your image. Then add a hue/saturation adjustment filter and drag saturation all the way down. If you prefer to use a different method, feel free!
After this step, you can choose to add a curves filter to refine your image. The darker a line is, the less transparent it will end up being.
The last filter is the invert filter. The mask is then ready.
Select everything by pressing CTRL-A, then do a merged copy by pressing CTRL+SHIFT-C.
Now click on your original layer and add a layer mask. Then ALT-CLICK on the mask to edit the mask only. The final step is just to paste in the mask by pressing CTRL-V. If you now hide or delete the layer and effects above your original layer, you will see that you have an image that is transparent where it used to be white, and everything else is partially transparent, depending on how dark the color is. You should see the checkered background through the parts of your image that is not completely black.

To verify that the extraction is ok, make a new layer and fill it with white. Then place this layer under the image layer. You image should now look exactly like it was before you removed the white background.
If you save this as a TIFF or PSD file, it will keep the transparency as long as you do not flatten all layers. And to use it, you only need to place it on its own layer over a document or a picture.
Most people do not like to have a transparent main object, so you need to make a quick mask of your object, fill it with white and place it under your new transparent image layer. But you now have the option to exclude shadows so that the shadow will fall on whatever background you choose for your picture.
Depending on the subject, I feel that it sometimes gets a little washed out. Then just duplicate the layer with the mask, and it should look good again.
This is an effect that is simply not possible by using a mask or doing a selection based on color.
If you like this post, feel free to leave a comment and consider sharing it on your preferred social media sites.
